New Features
1. Co-Creation and Collaboration - Record Sharing Enhancement
2. Scientific Notation
3. View Sharing
Record Sharing Enhancement
Sharing records is a frequently used Alchemy feature. We have enhanced this feature by making it more secure, organized and accessible to your external collaborators.
Sharing a Record
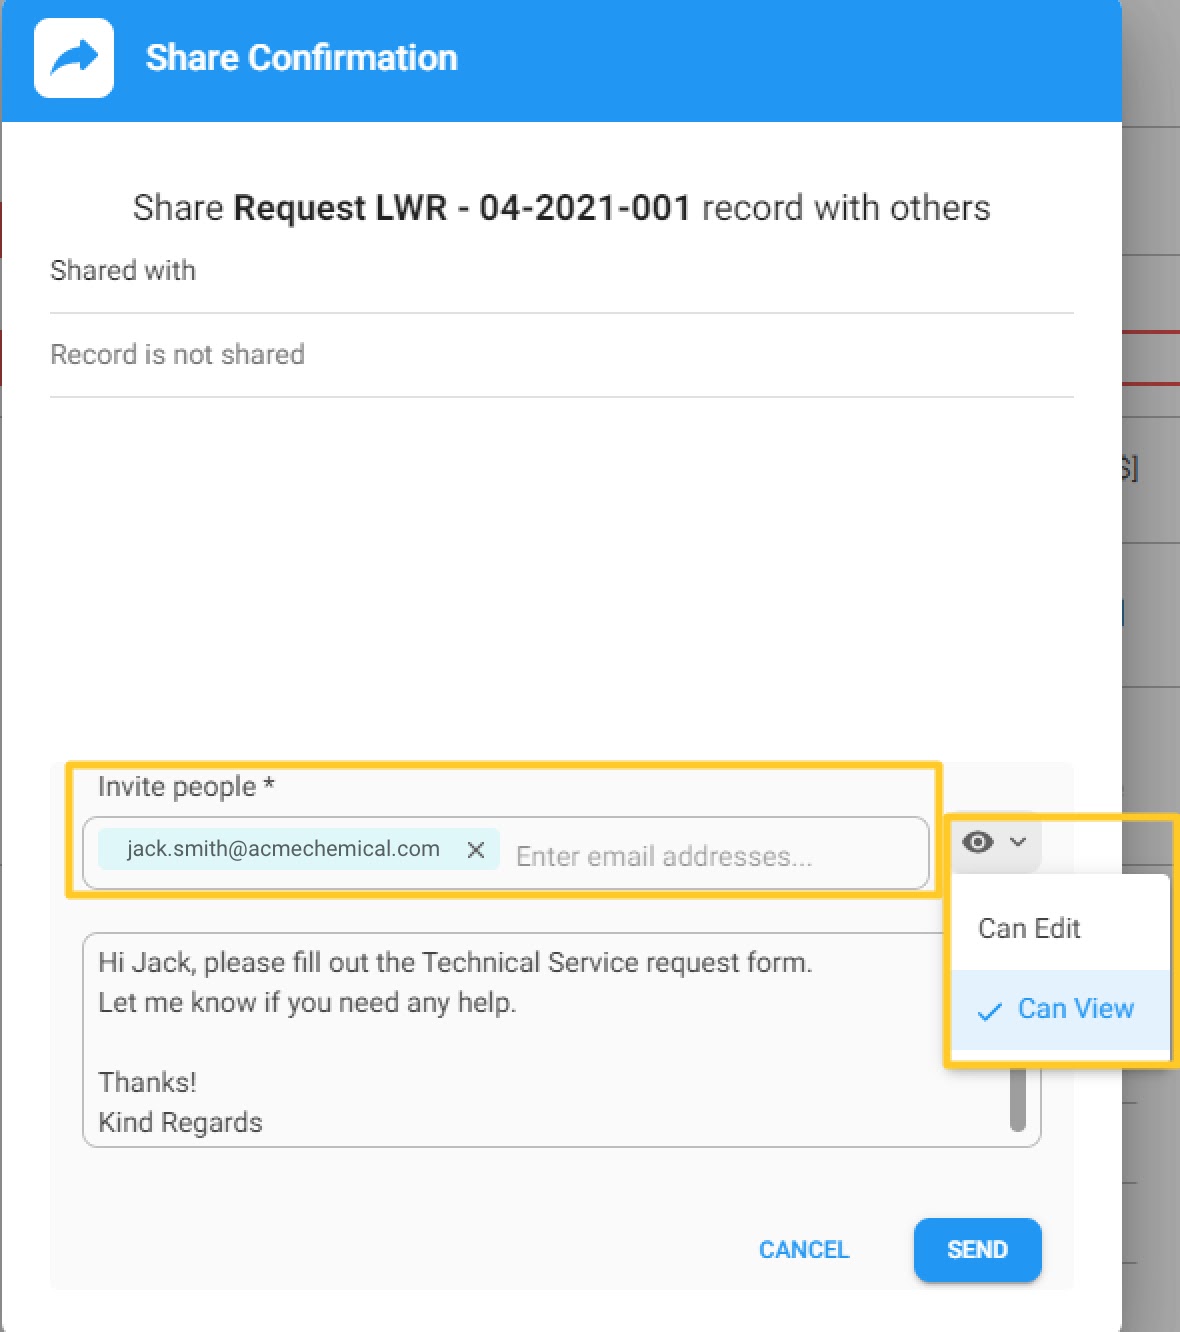
If Share Record functionality has been set up in your configuration, click on the share arrow in the right corner of the record to share it. If this option has not been set up in the configuration portal, you won't see the "share arrow" icon, in that case, please contact your dedicated CSM to set this up.

A pop-up window for sharing details will appear as you can see below. You can enter the email addresses of your customers, suppliers or other people even within your own company with whom you want to share the record. By clicking on the "eye" icon you can choose whether that person has view rights or edit rights for that record. The default is view rights, not edit rights.
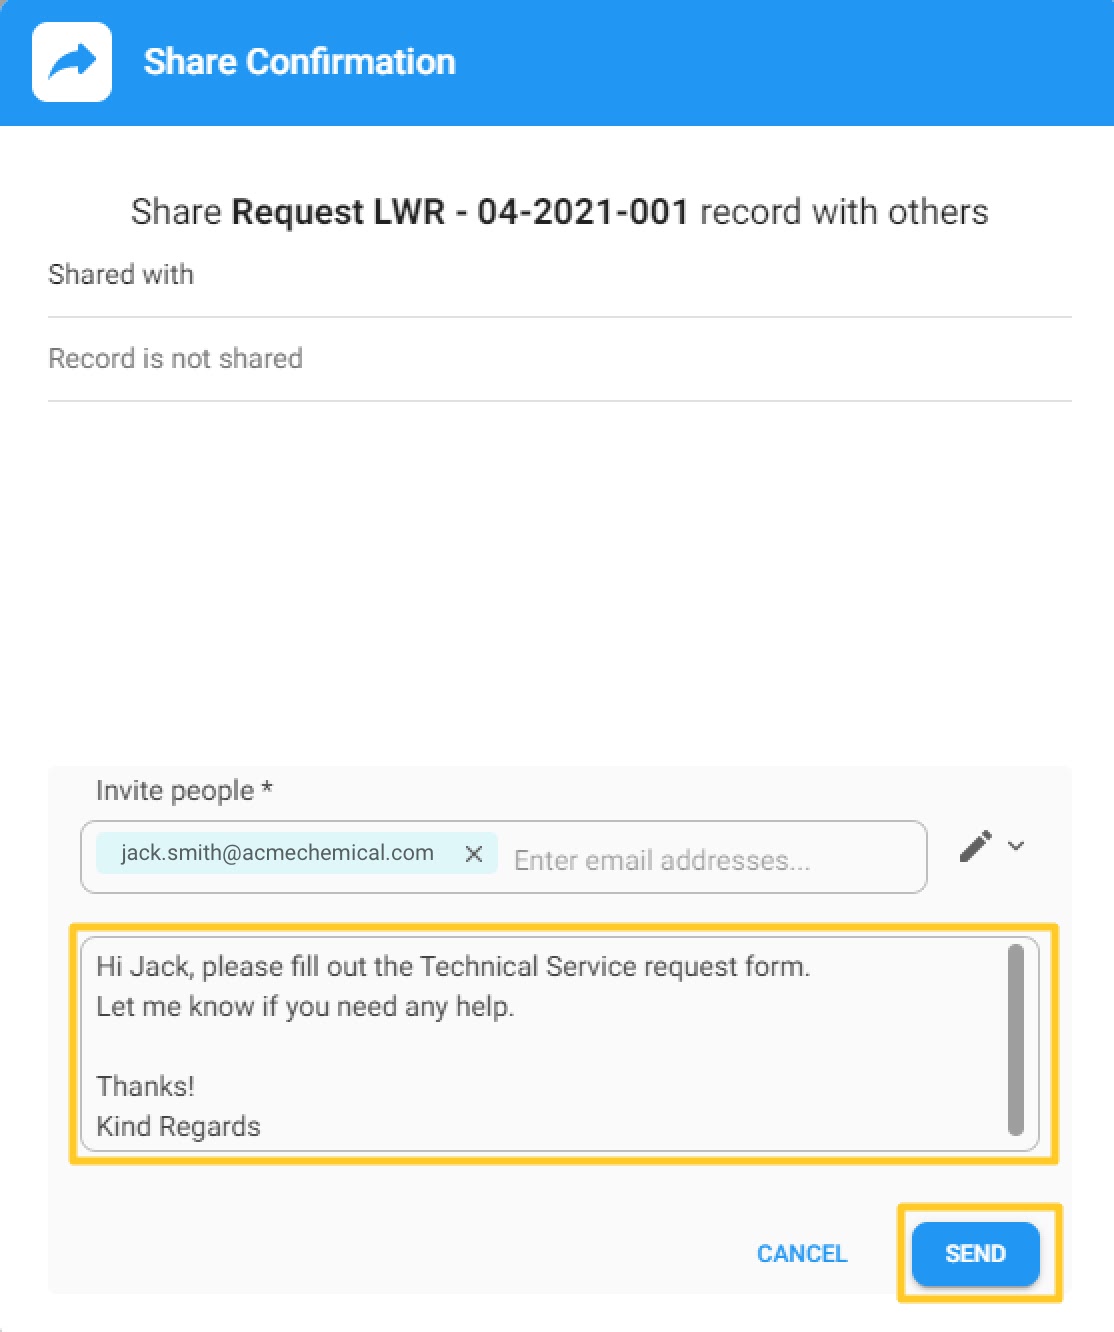
You can also write a short note for the recipient(s).Then click on the SEND button.
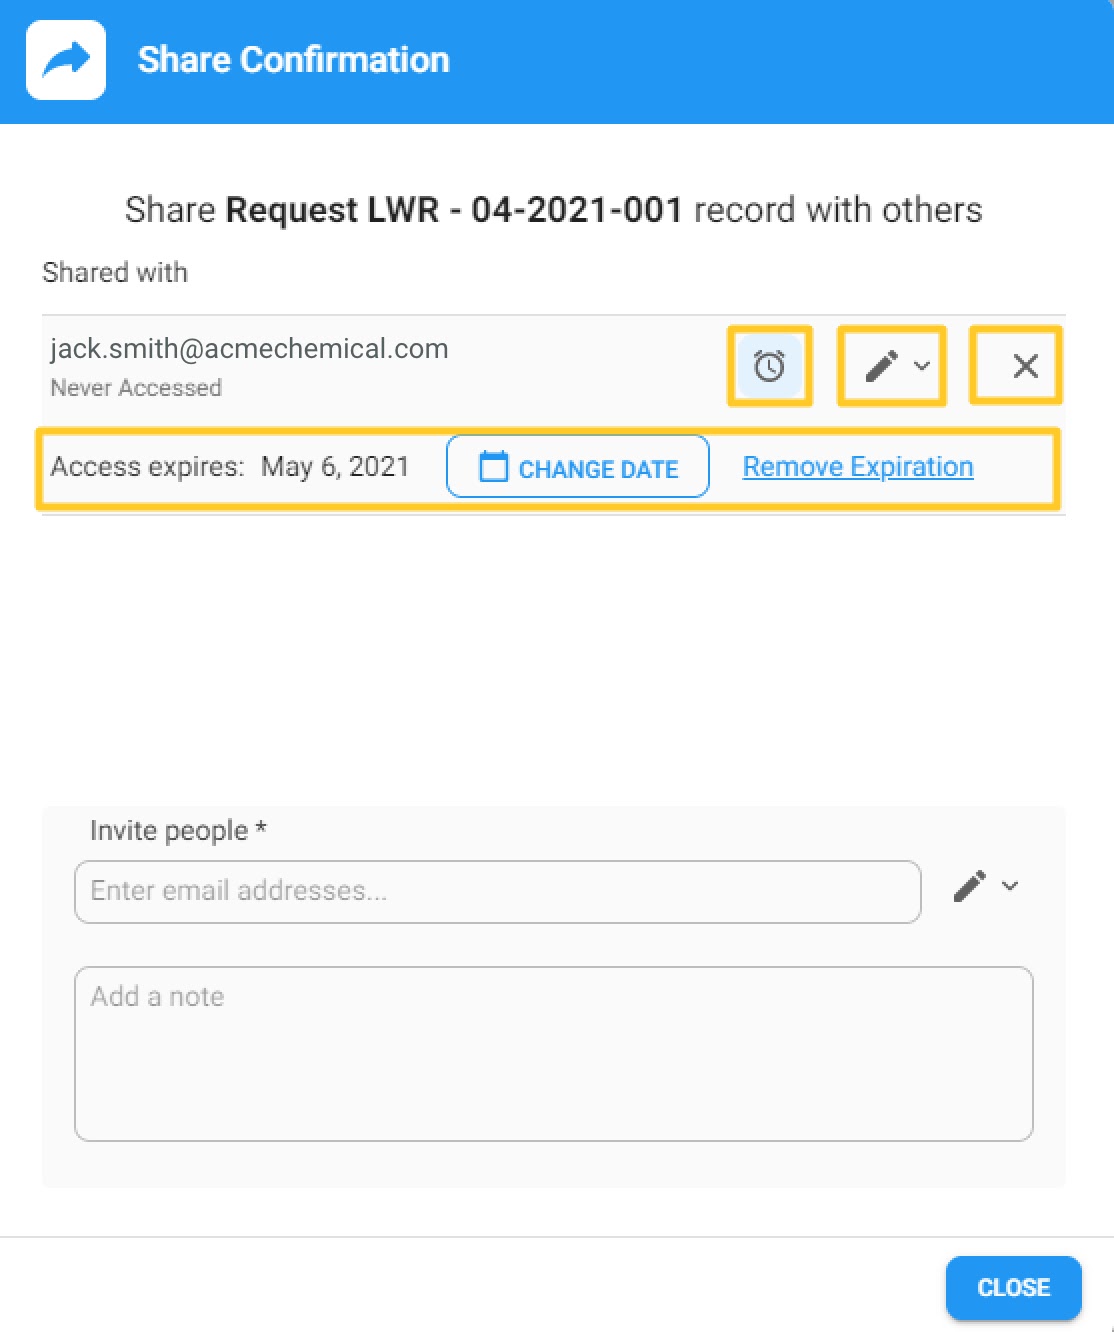
When you click on the SEND button the pop-up will change to the screen below. By clicking on the "clock" icon you have the option to define the expiration date of the shared record link and by default, it's set to one month. You can change the edit rights by clicking on the "pen" icon or cancel sharing by clicking on the "x". Below the email of the person you have shared this record with you can see a message "Never Accessed", this message will change after the person enters the record, in that case, the message will be: "Last Accessed: Date and time". Click the CLOSE button when you're finished.
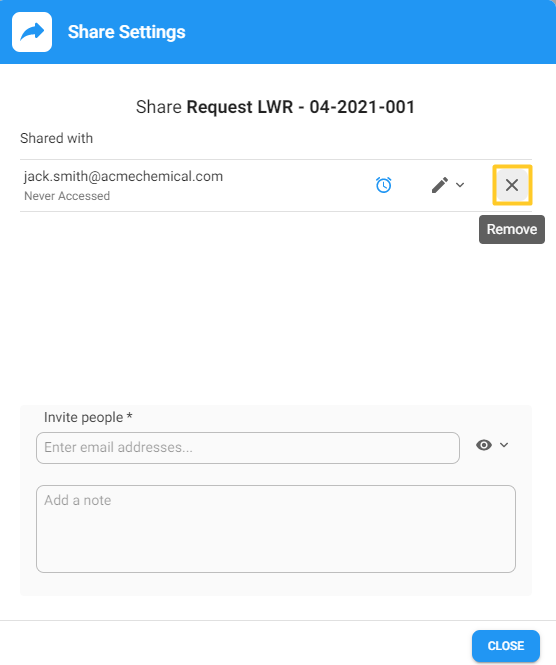
If you want to rescind access earlier than the expiration date you set, go back to that exact record that you shared and click on the "share arrow" icon again.
In the pop-up that appears, click on the"x" next to the collaborator's email to rescind access and the record will no longer be accessible by the recipient.
Collaborator's Access to Shared Records
Once you've shared this record, your collaborator will receive an email like this:
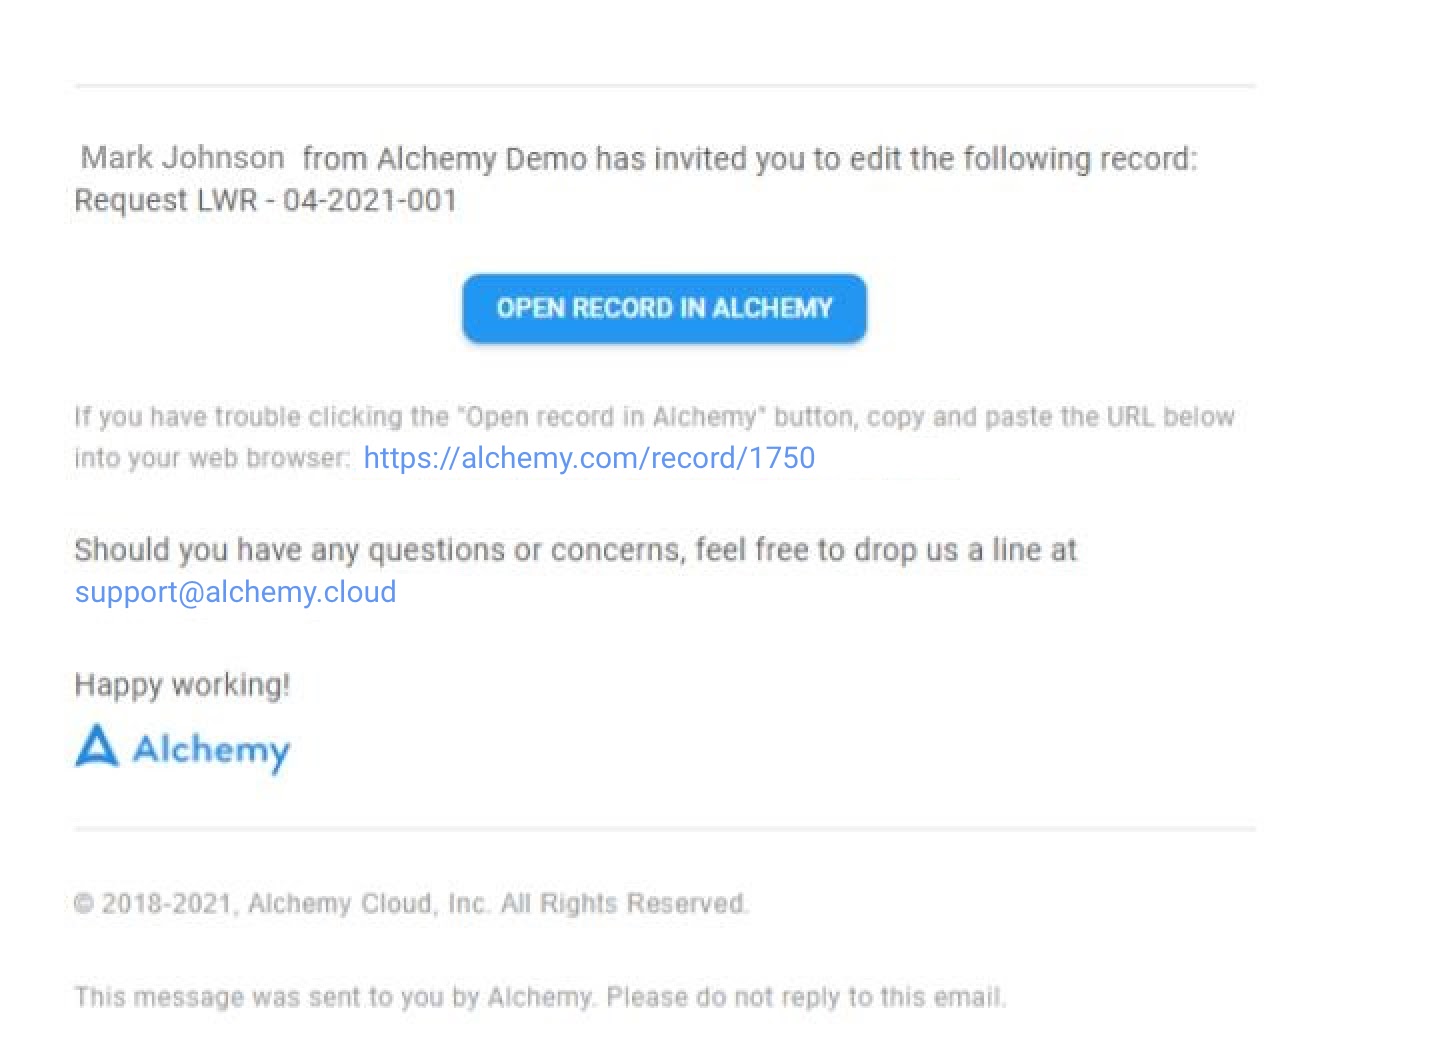
To increase security and provide more controlled access to your data, when a collaborator clicks on the OPEN RECORD IN ALCHEMY button the user’s identity will be authenticated and the user will be registered with Alchemy. The registration process will be required only the first time an Alchemy record is shared with a collaborator. Of course the recipient will be asked to authenticate their identity each time they want to access the record. To do this efficiently, the process will start with this page which enables Single Sign On (SSO):
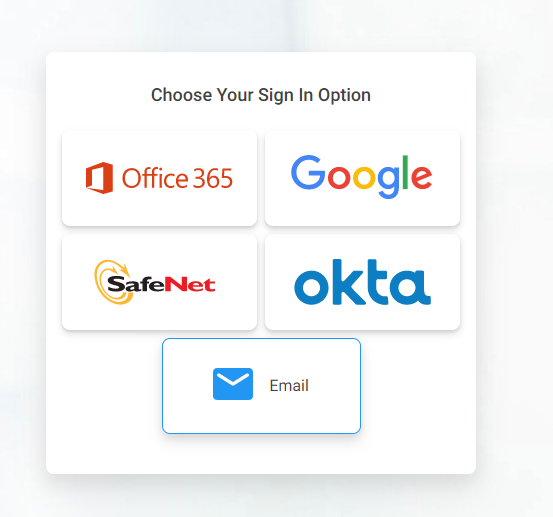
Single Sign-On Flow
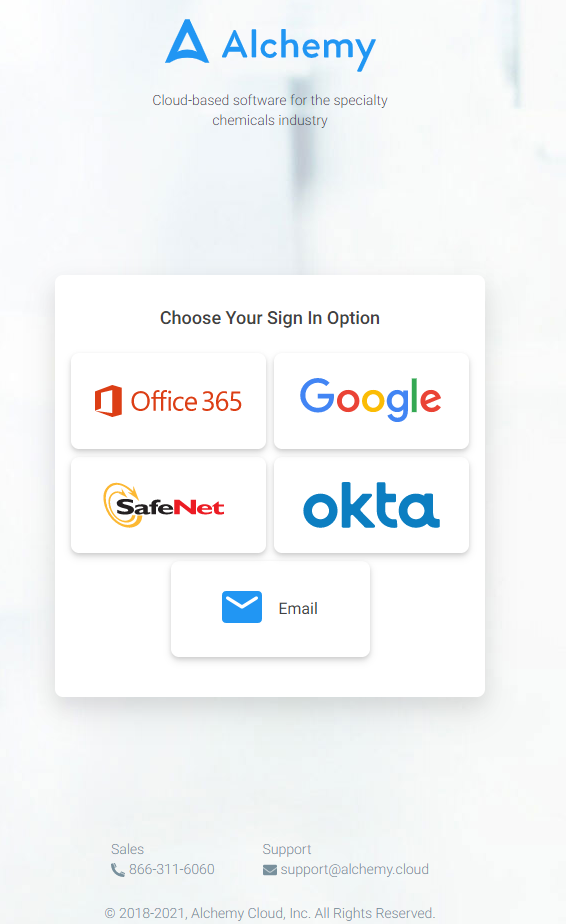
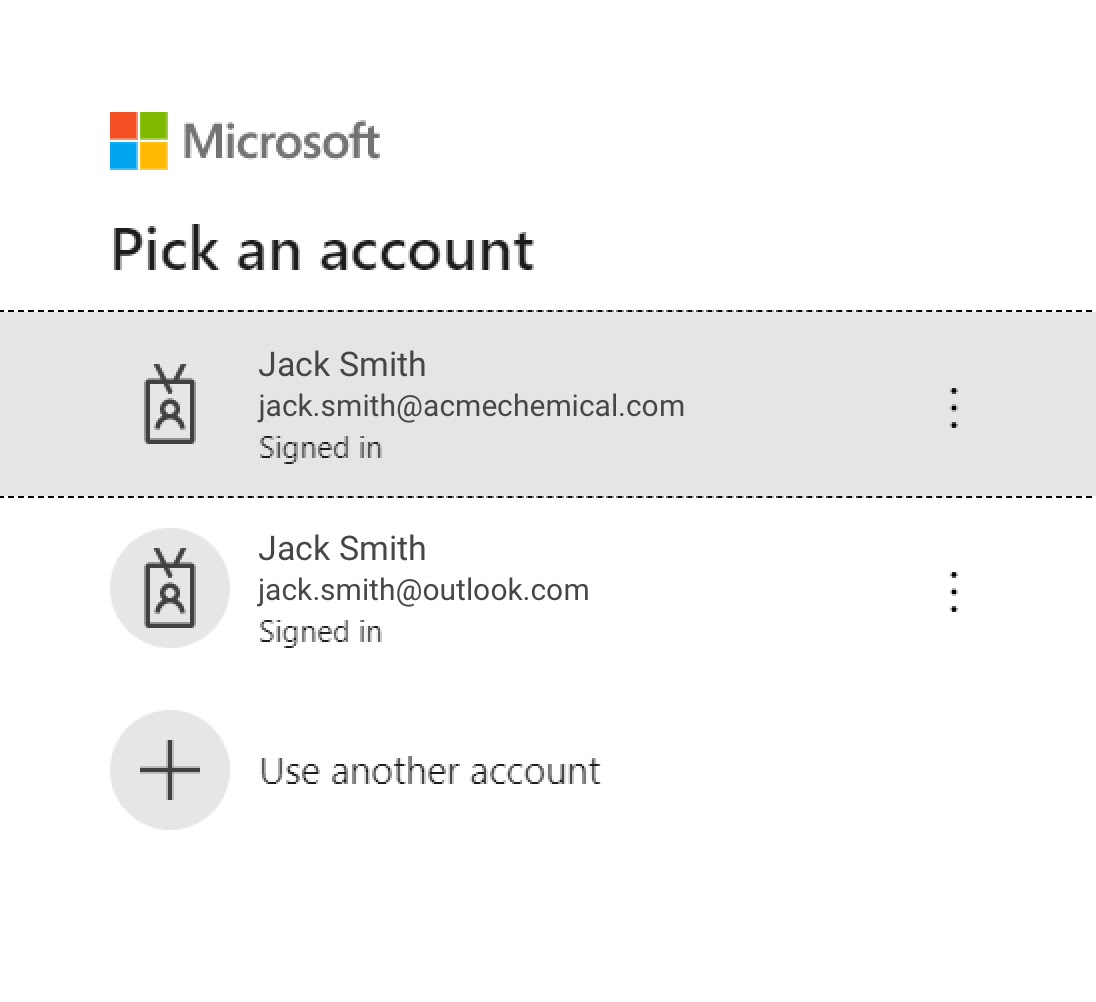
Using Single Sign-On (SSO) is the fastest, simplest and most secure way for your collaborators to work with you. When you click your corporate standard - Office 365, Google, Safenet or Okta - all you need to do is select your account (if you have multiple) and SSO identity verification will take place leveraging YOUR corporate IT security protocols. It will look something like this for Office 365:
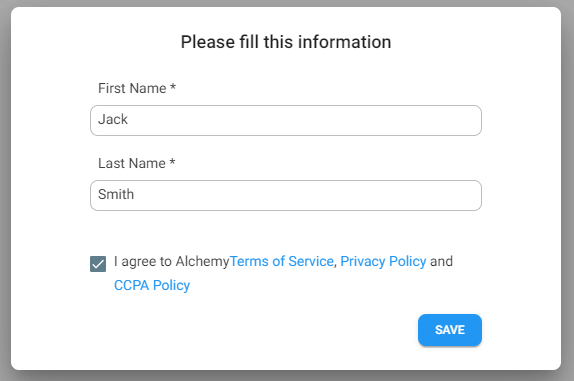
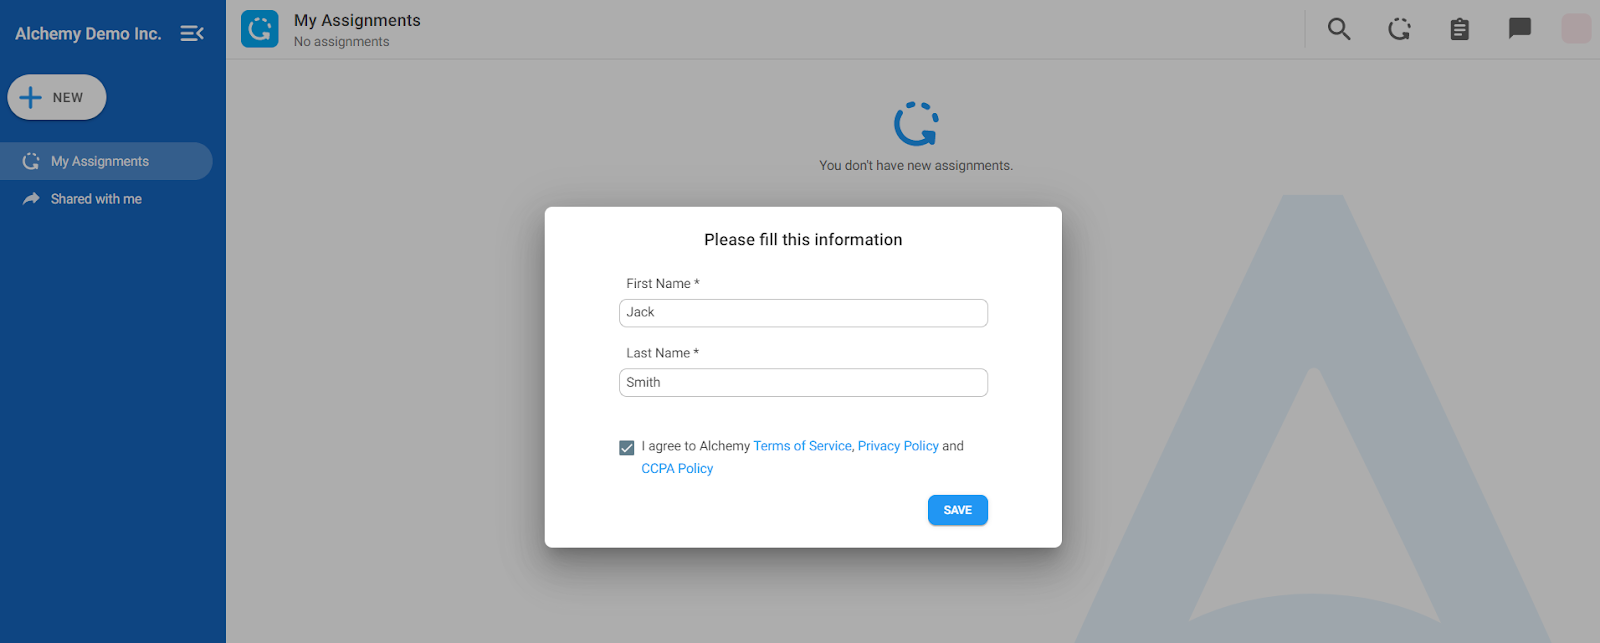
When you select the account, you are taken to Alchemy where a pop-up will appear for you to fill out your First and Last name and accept Terms of Service.
After these few steps your collaborator can see the records you have shared with them.
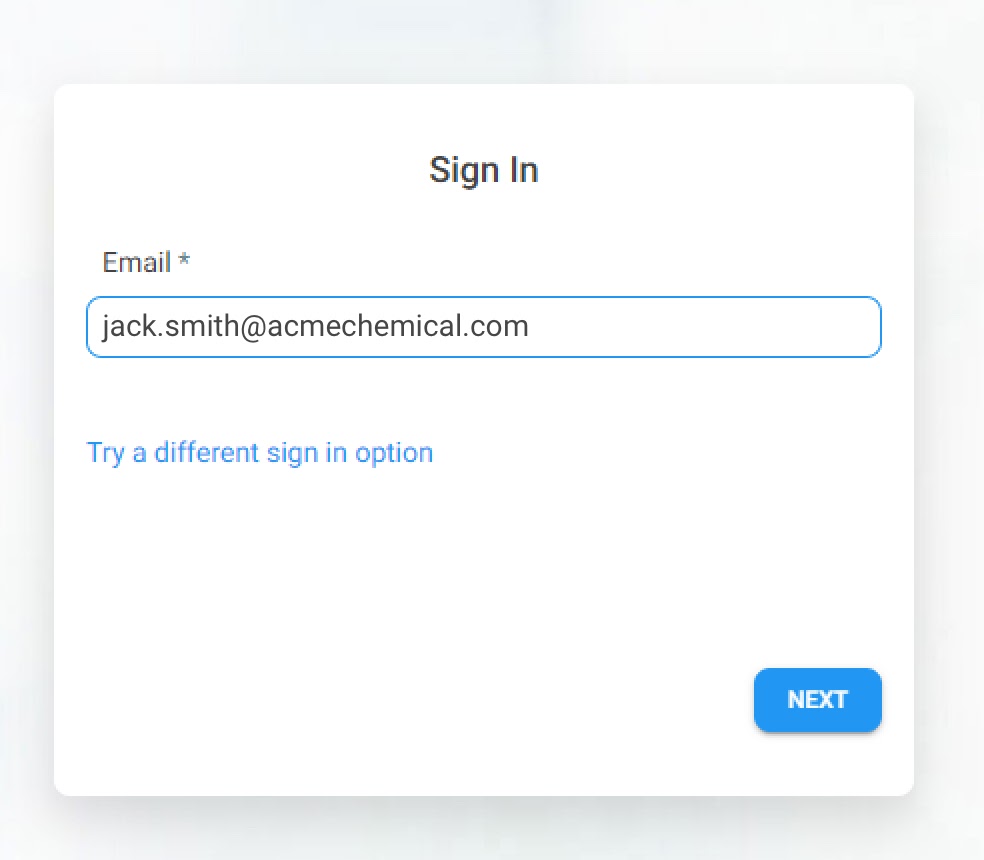
Email Flow
You can also use your email to register. However, this process involves several more steps in order to verify your identity via your collaborator's corporate email address. First, enter your email, then click NEXT.
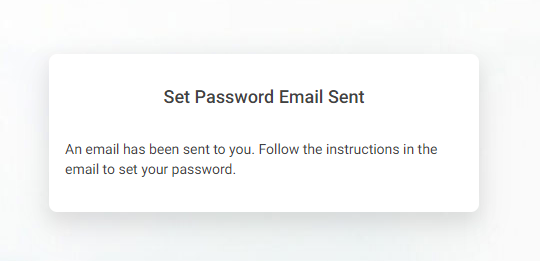
This is the message collaborators will get:
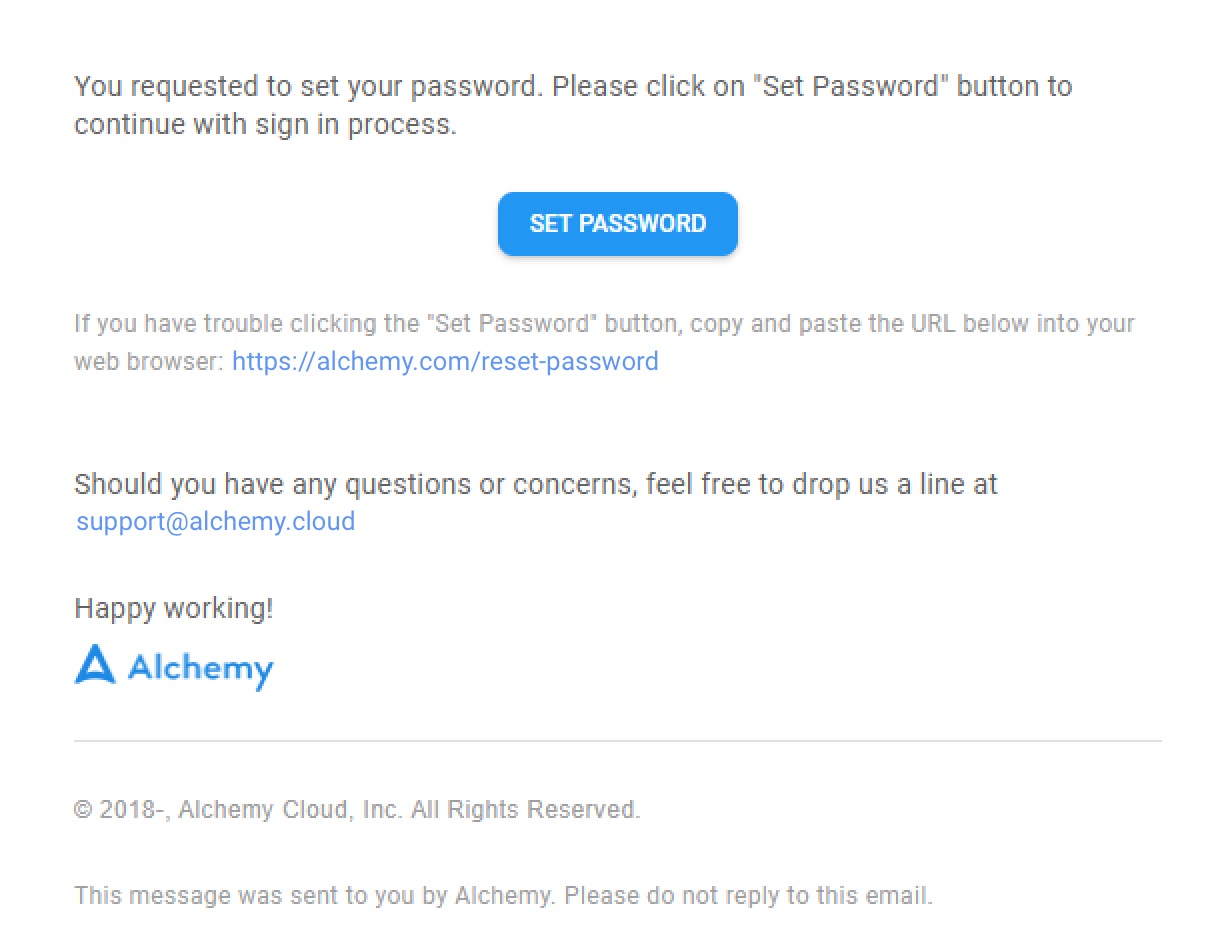
The collaborator should go to his/her email and click the button SET PASSWORD which will look like this:
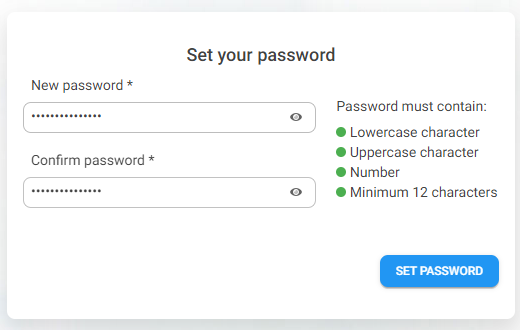
The screen for password set up will show up:
After password set up, the initial sign-in page will be available. This flow assumes the collaborator wants to use their email and not SSO. In this case, they should select Email:
Collaborators that are registering for the first time will be asked to fill out their First Name, Last Name and to agree with Alchemy’s Terms of Service:
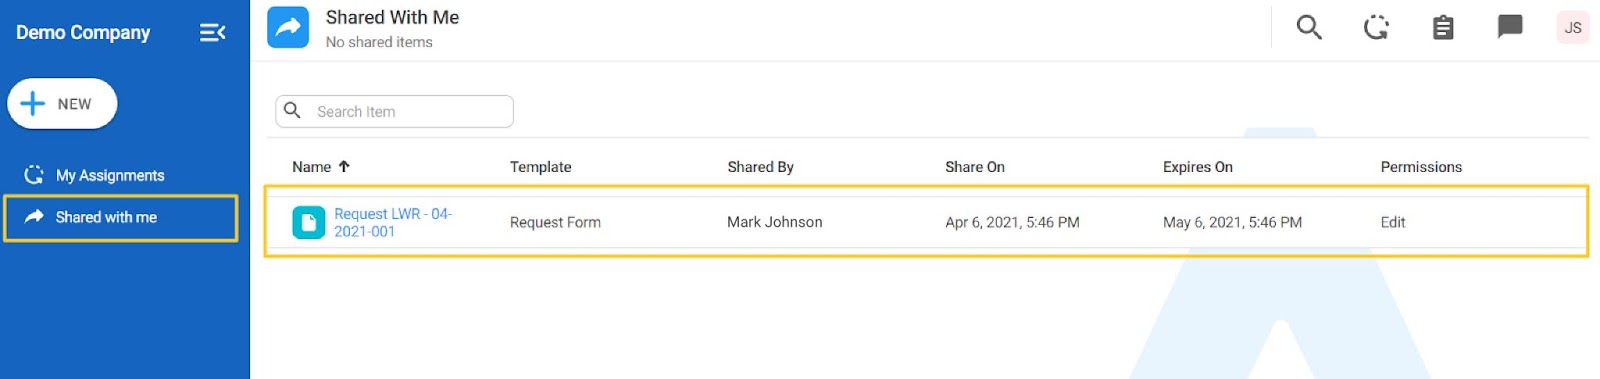
Collaborator’s Home Page/Alchemy Record Repository
On the Homepage in the left blue sidebar there is a menu item "Shared With Me." When clicked, it displays a list of all records shared with that collaborator:
When the collaborator clicks on a record link, they will be taken to the record:

Importantly, for records that are shared a second time, the collaborator will be taken to the sign-in page to validate their identity and then directly to the shared record.
The URL for directly signing in to Alchemy is: https://app.alchemy.cloud/sign-in
Multiple Tenant Access
If the collaborator is receiving records from multiple Alchemy Customers, they can easily switch between tenants by clicking on the logos of those companies on the far left side:

Scientific Notation
Scientific notation of numbers is now available in Alchemy for Number field types.
We have introduced the displaying of numbers in scientific notation because the longhand version is difficult to input and read. If you would like any of your current fields changed to scientific notation, please contact your dedicated CSM and they will change it in our configuration portal.
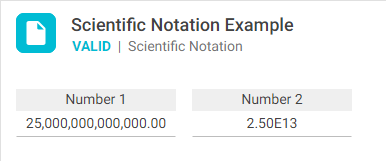
In these fields, E stands for an exponent of 10, and it's always followed by another number, which is the value of the exponent. For example, the number 25 trillion will be shown as 2.5E13.
In the example below Number 1 does not have scientific notation turned on, while Number 2 does:
When scientific notation is turned on in a number field, the input can be either the number with zeros or the number written with "E" (or "e") and the number of zeros behind it. If the number field has some kind of calculation and the scientific notation is turned on, the result will also be displayed in the format with "E".
Views Sharing
In this release, we are enabling the Views to be shared with different people from your organization.
Share a View
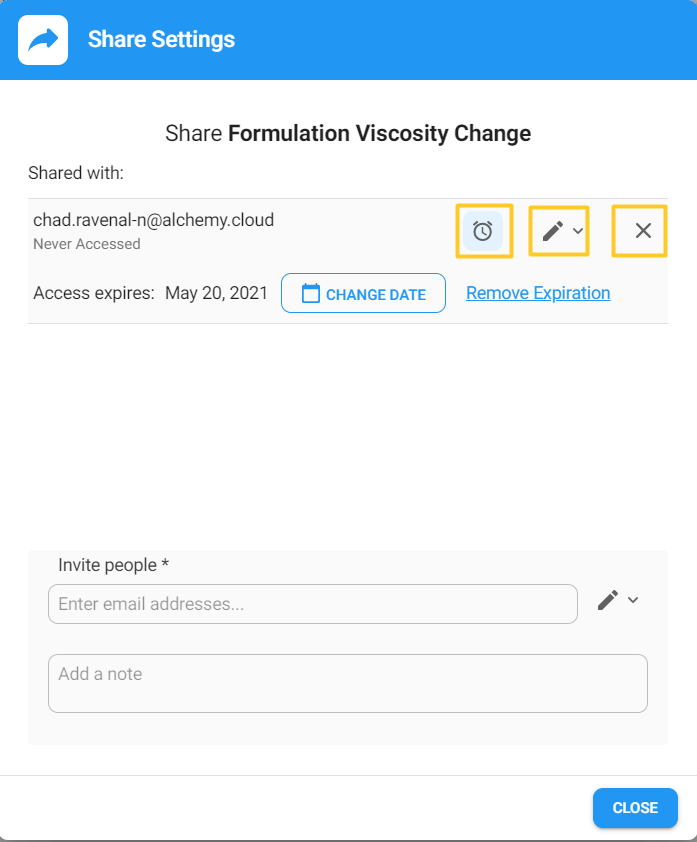
Views can now be shared similarly to how records are shared. This feature allows you to share Views with either “edit” or “view’ rights with your colleagues. To start sharing a View click on the exact View that you would like to share and click on the "share arrow" icon in the upper right corner.
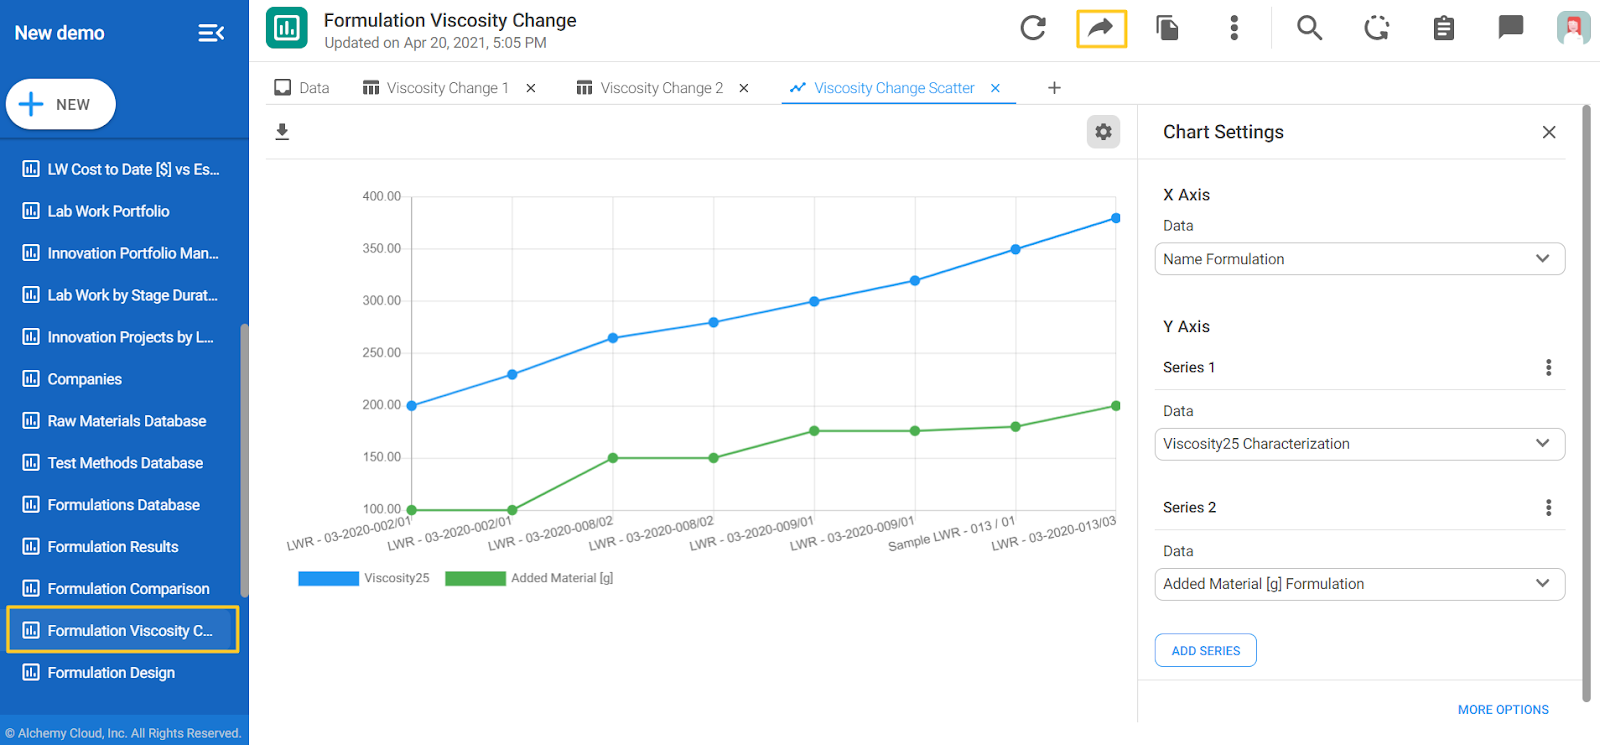
A pop up will appear where you can enter your colleagues' email (you can enter multiple emails) and select whether you'd like them to have View only or Edit rights.

Important Note: If you select "Can View", this person will NOT be able to change anything in that View. Conversely, if you select "Can Edit," this person can change this View and these changes will be propagated to ALL people that have this View shared with them as well.
Click "SEND" and then you'll have options to set up an expiration date of the View sharing by clicking on the "clock" icon. On the "pen" icon you can change the View or Edit rights. If you click on the "x" the sharing will be canceled. At the end click "CLOSE".
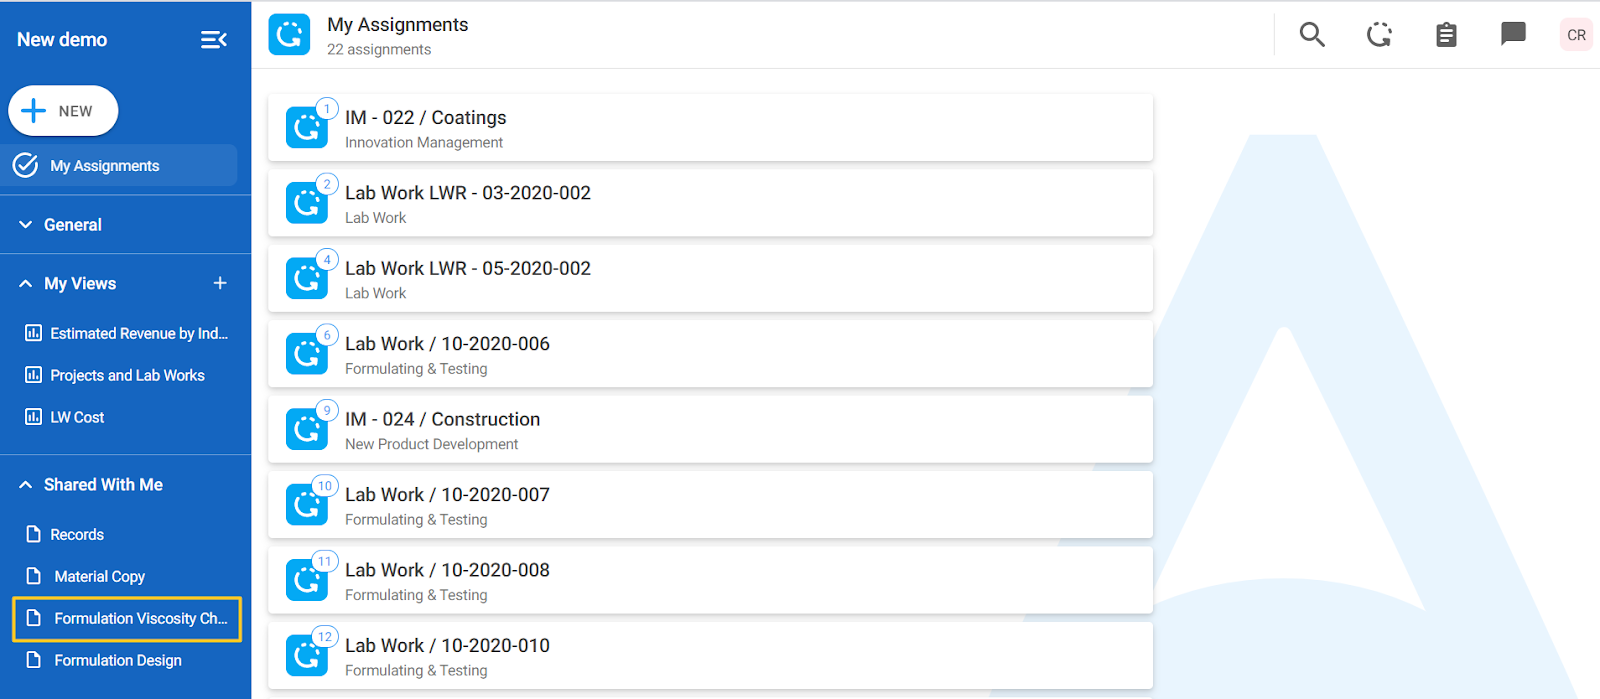
The person with whom you have shared a View will have it available in the Shared With Me section in the left blue side bar.
Clone a View
The ability to Clone a View is now available. Click on the "Clone view" icon and this view will be cloned and the clone will be named the same as the original with the word "Copy" at the end. Newly cloned views will be available in the My Views section.
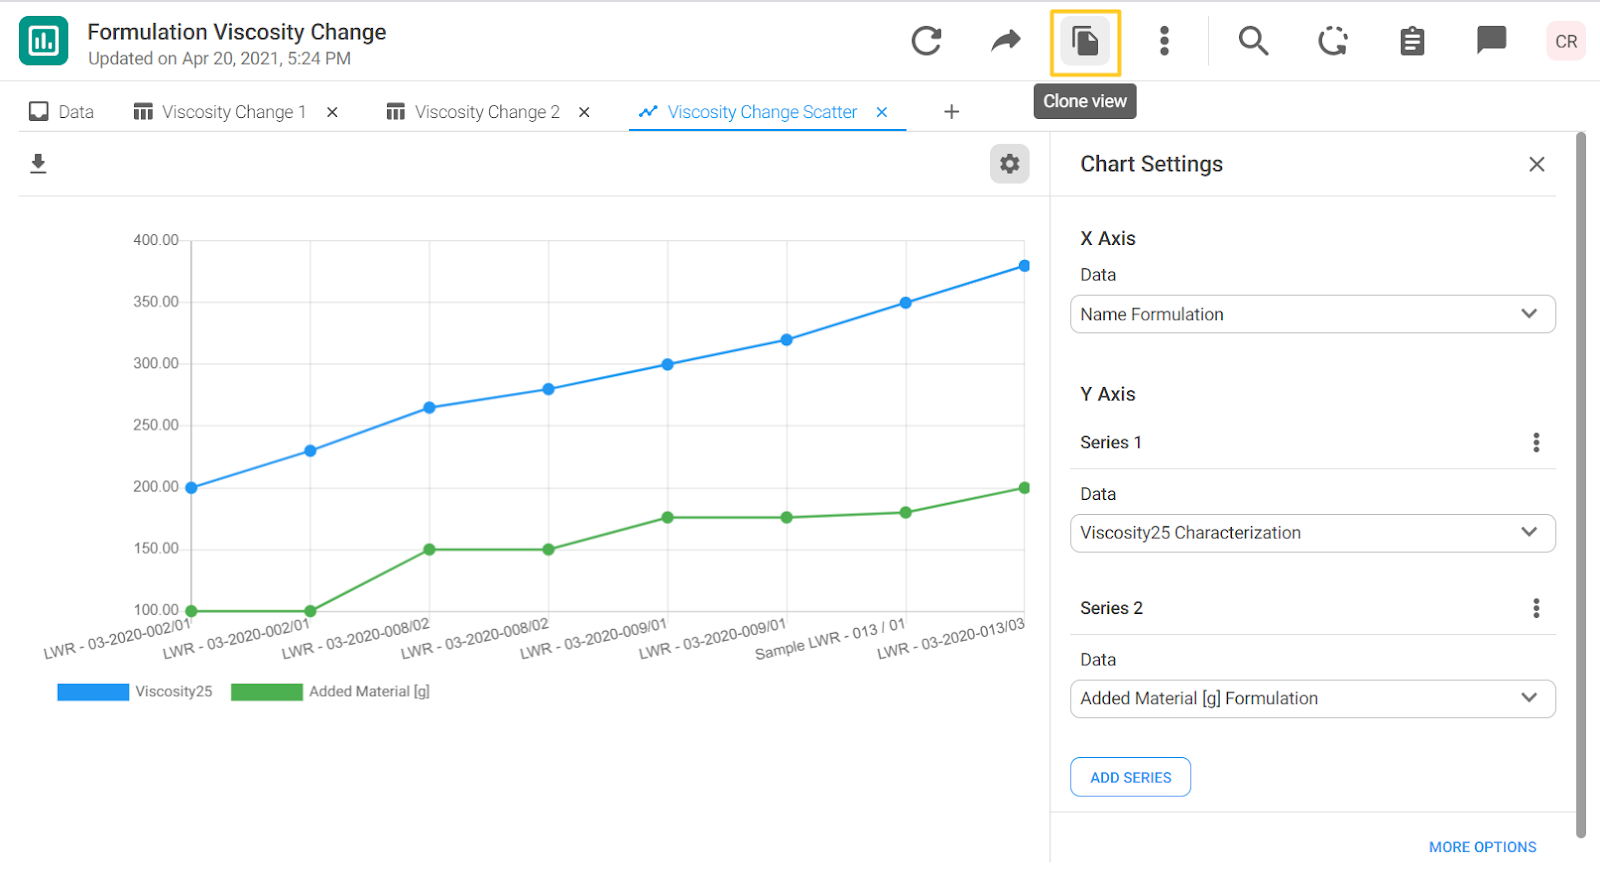

Note: You cannot clone views that were shared with you with read-only privileges.
Categories of Views
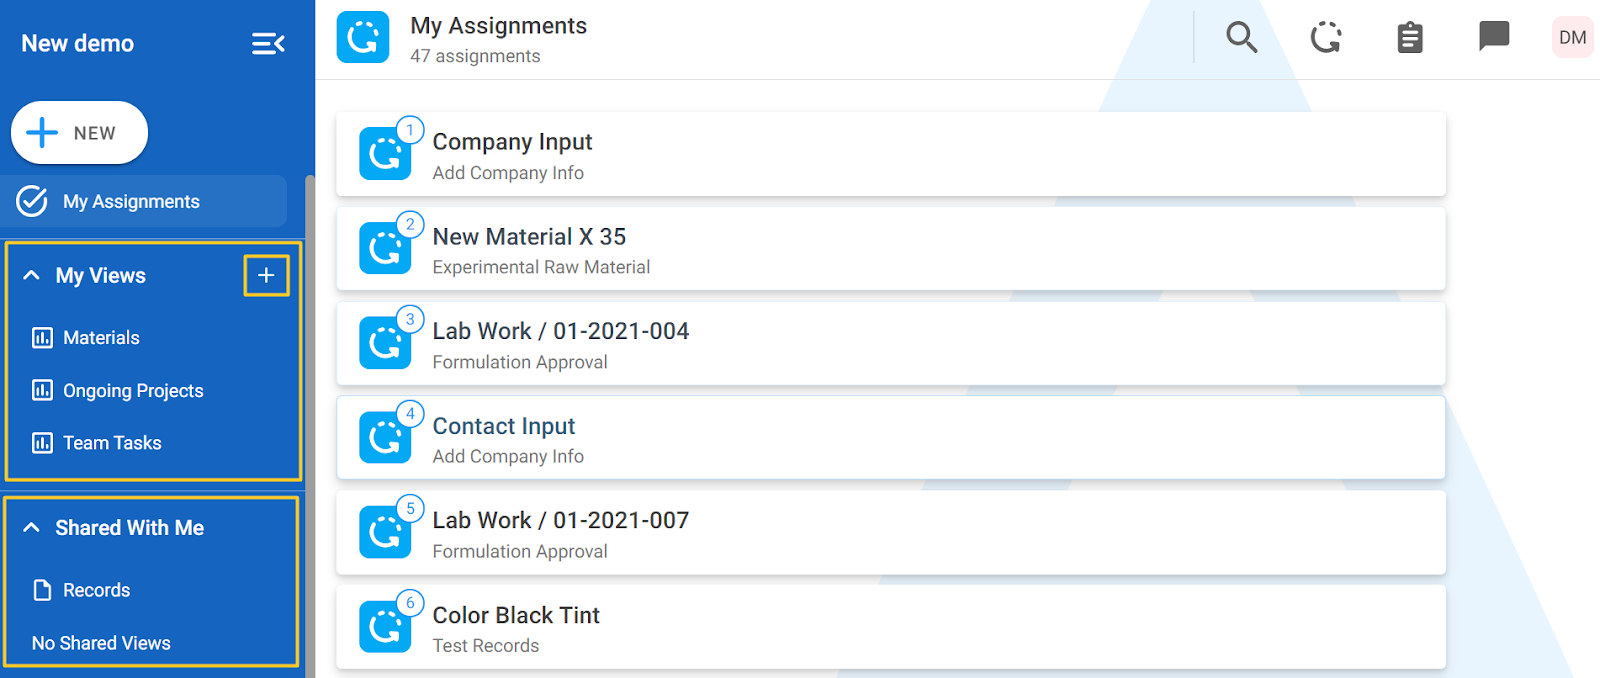
By default, all Views are grouped into at least two categories in the left blue sidebar: My Views and Shared with me. These categories can be collapsed or expanded, so you get a better overview of the list of Views that you have.
To make a new View, click on the "+" icon next to the My Views (it's not behind the big +NEW button anymore).
You can contact your CSM to see if there are categories of views you want your team to have by default. For instance, in the screenshot below default views are grouped by General, Sales, Tech Service, My Views, and Shared With Me:

Keep in mind that views that are configured by default are in view-only mode. If you want to change one, just clone it first and then edit as you desire. Newly cloned views will pop up in your My Views section.