Digitizing your processes is a core functionality of Alchemy. Not surprisingly, our customers spend more time on the process details page than any other page in Alchemy.
We redesigned the process details page after spending a lot of time talking with our customers and studying their everyday workflows. The goal of the changes outlined below is to enable you to get your job done easier and faster.
Easier process creation and enhanced requirements collaboration
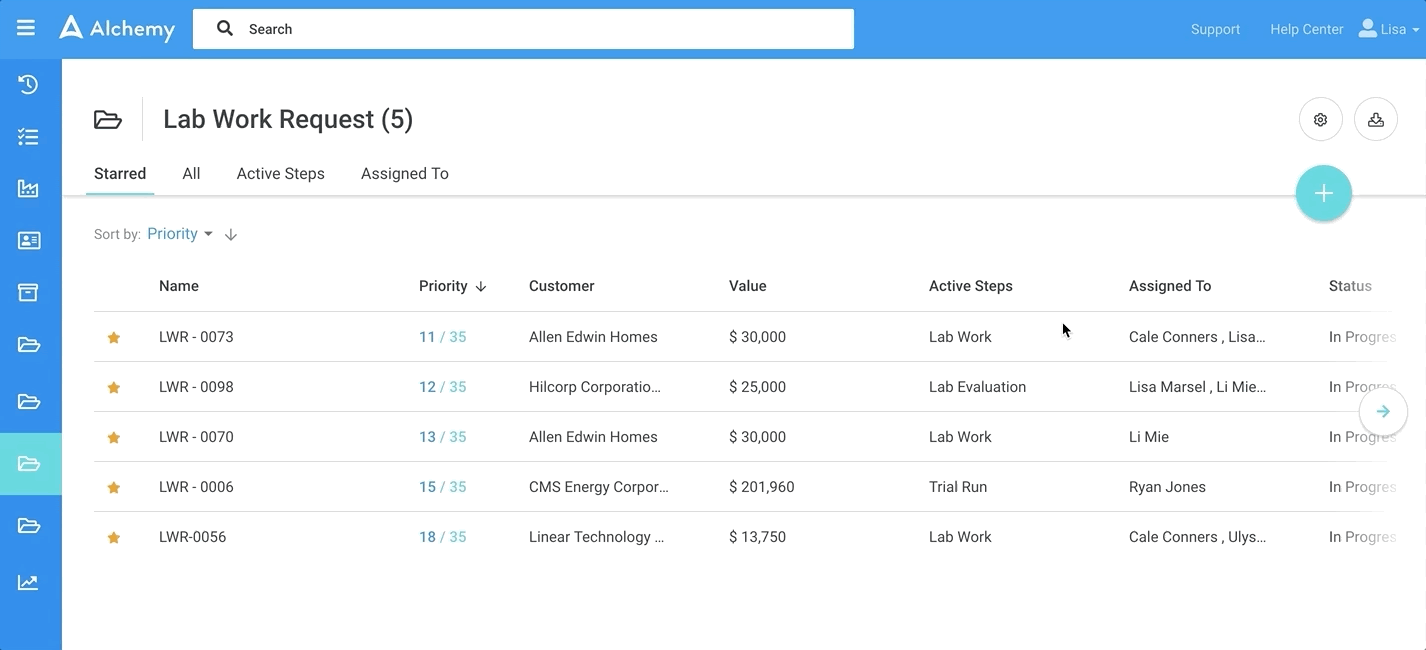
Now you can create a process just by clicking the + Process button, giving it a name and choosing the customer (if required). This should enable a quicker start, a logical way to gather requirements over time and enable collaboration while gathering requirements.
You can collect requirements on your own or invite a colleague to participate by creating additional tasks and assigning the tasks to them. This all can be done quickly and easily without leaving the process details page.
Changing a process name is also now fast and easy. Just hover over the current process name and a Rename button will appear. Click the Rename button to change the name. Remember, the new name still needs to be unique - there can be no duplicate names.
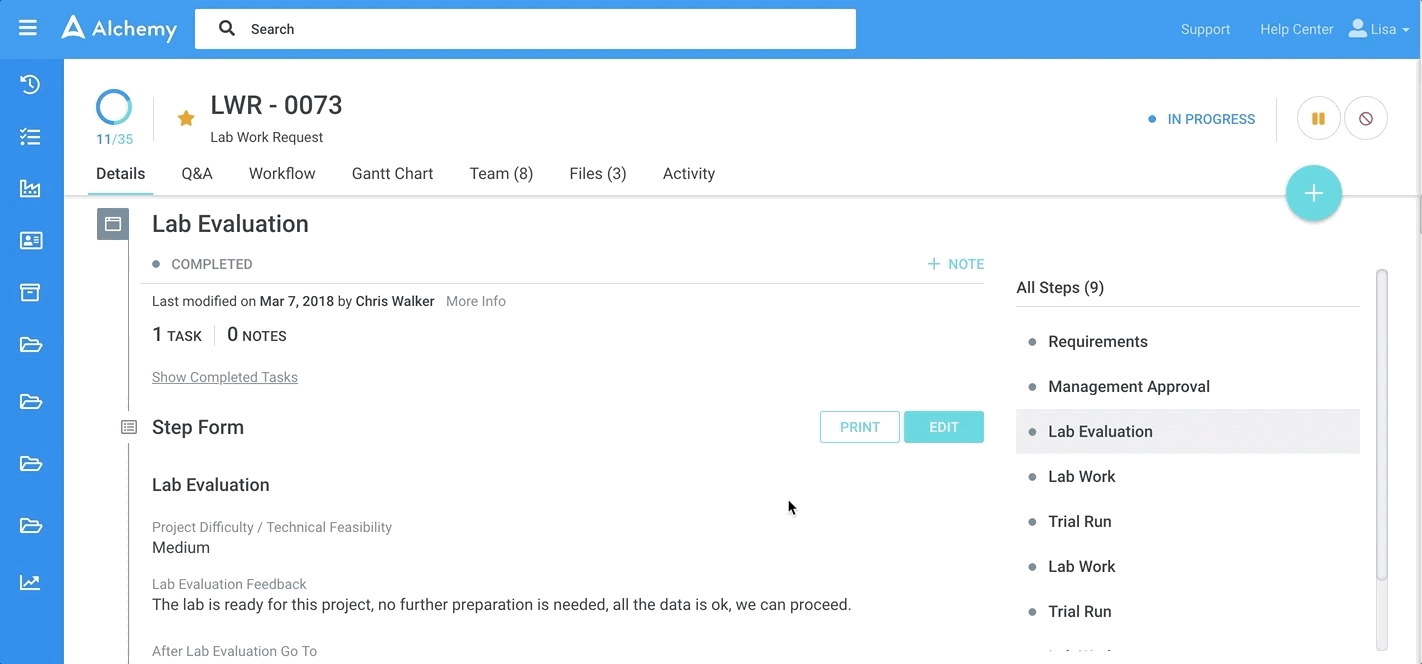
Clear overview and navigation of steps
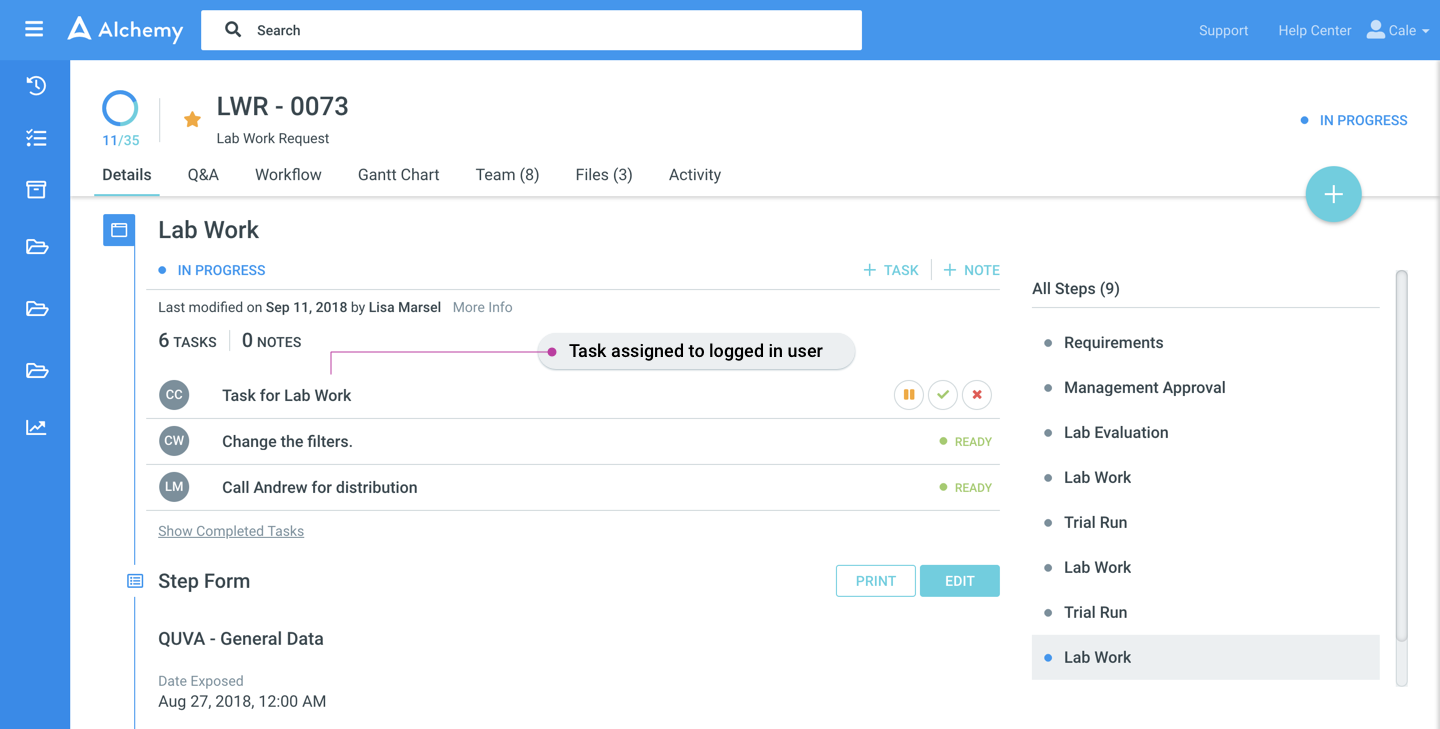
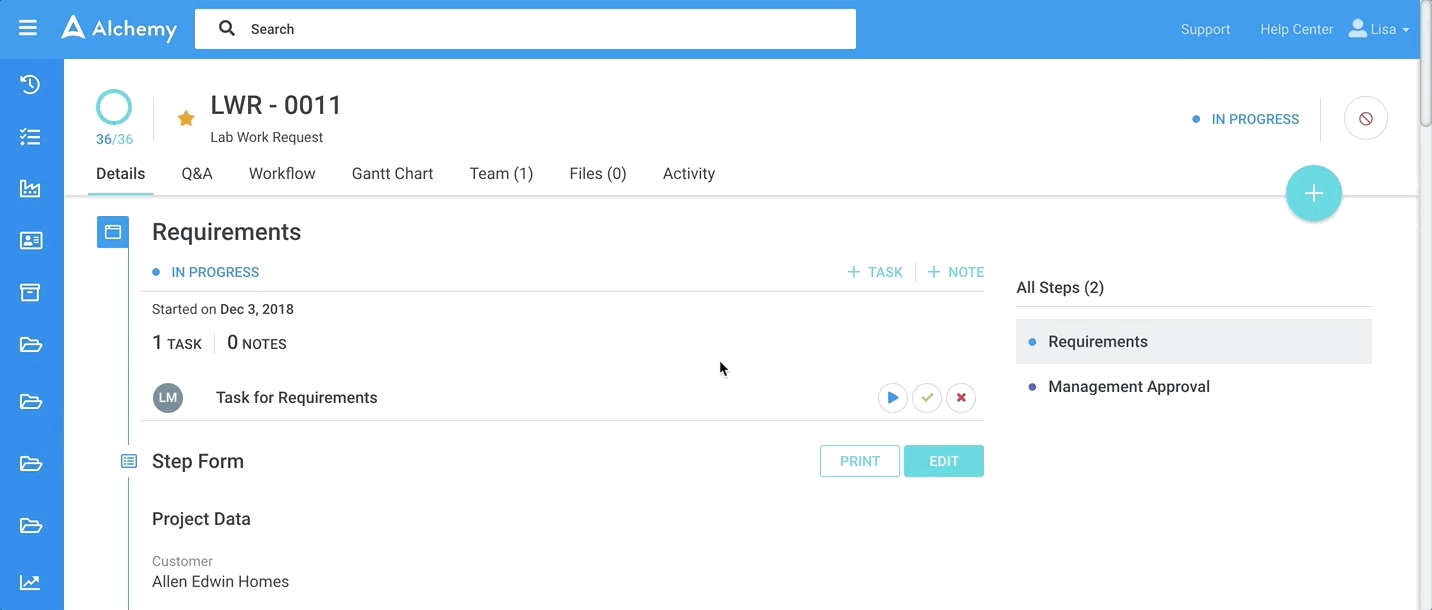
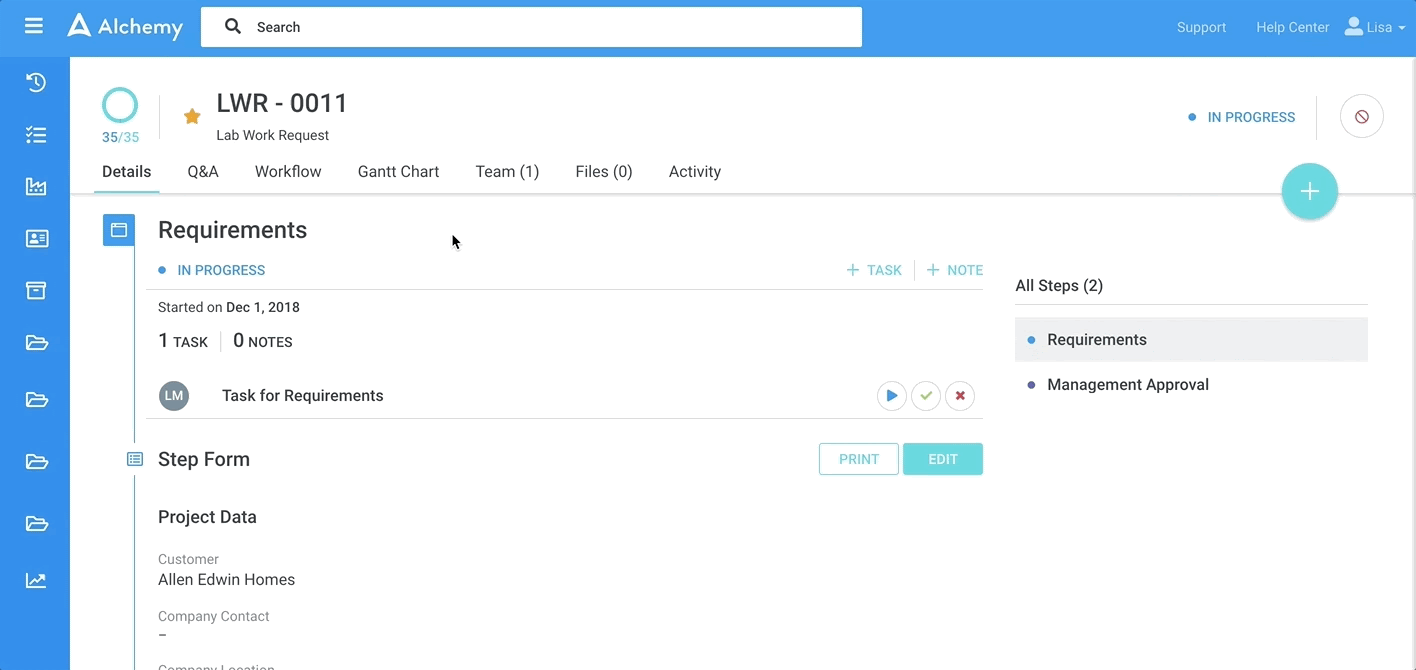
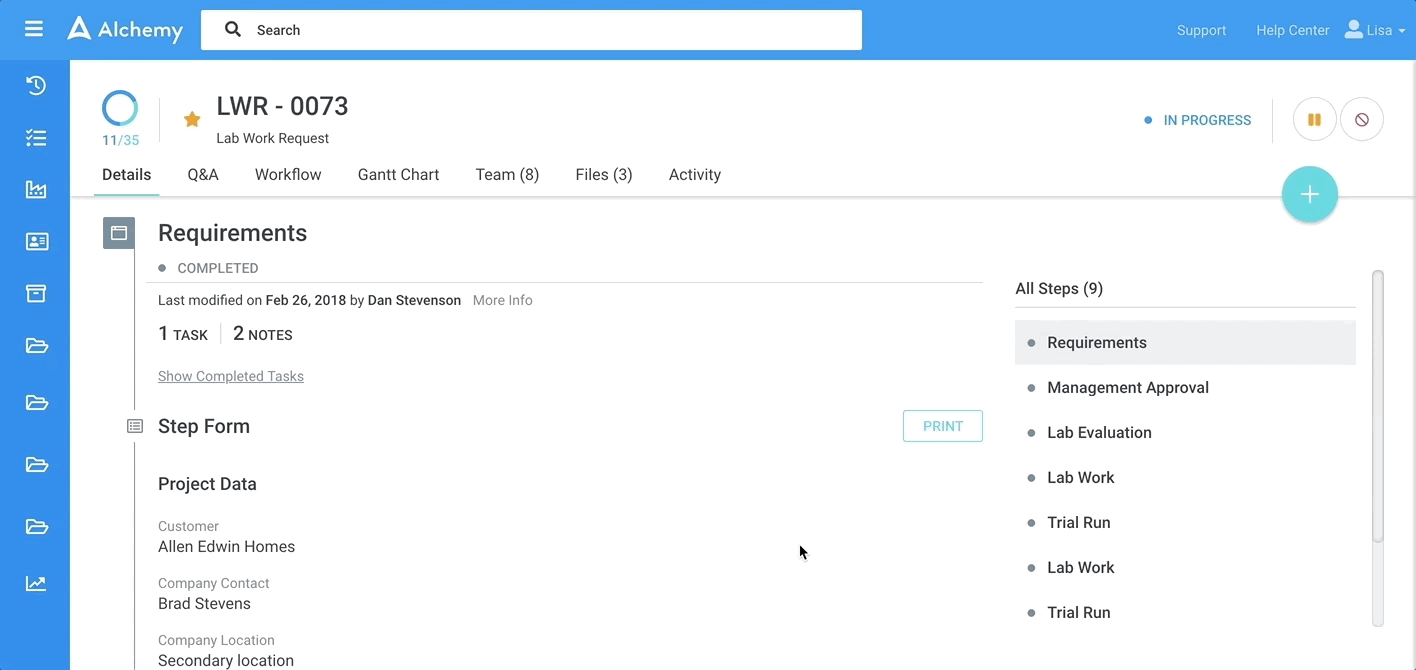
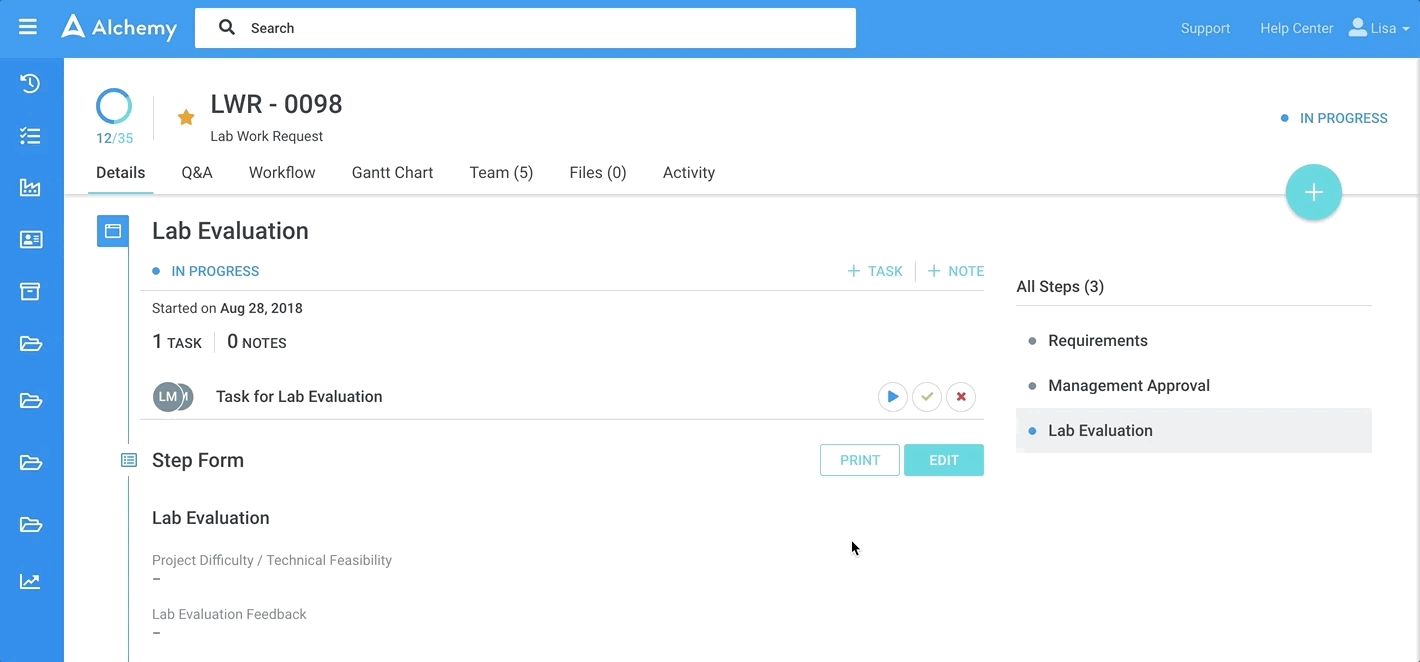
Our new step design highlights general step information like step name, current status, the last person who modified it, and the number of associated tasks and notes.
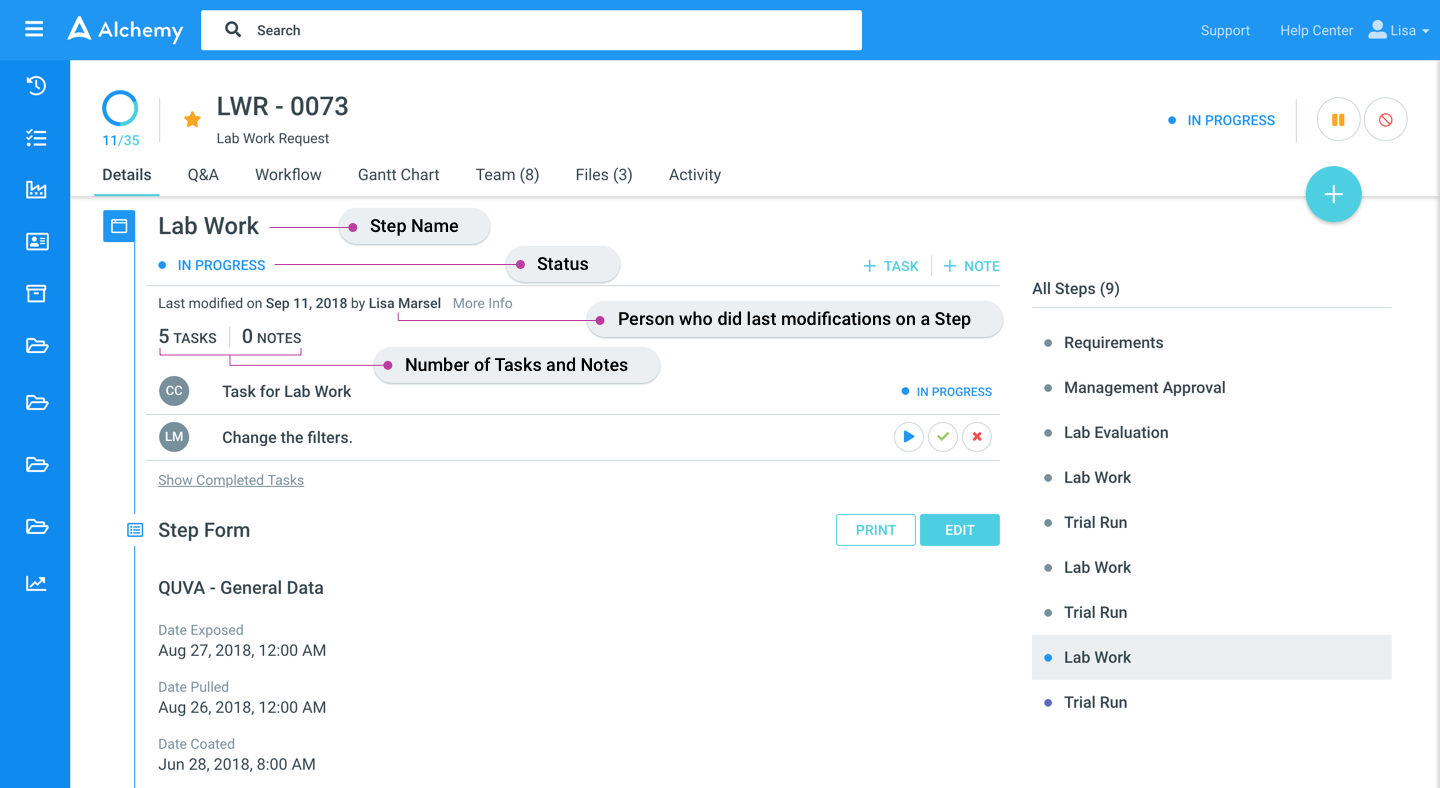
We know processes can contain a lot of data and become long. To more easily maneuver through the page, we are introducing side navigation. Click the name of the step you want to view. Grey dots represent completed steps, blue dot represents in progress, and purple dots represent steps that have yet to be done (pending).
Integrated tasks
All tasks associated with a step are accessible on the process details page. Ongoing tasks are immediately visible. You can see completed tasks by clicking the Show Completed Tasks link.
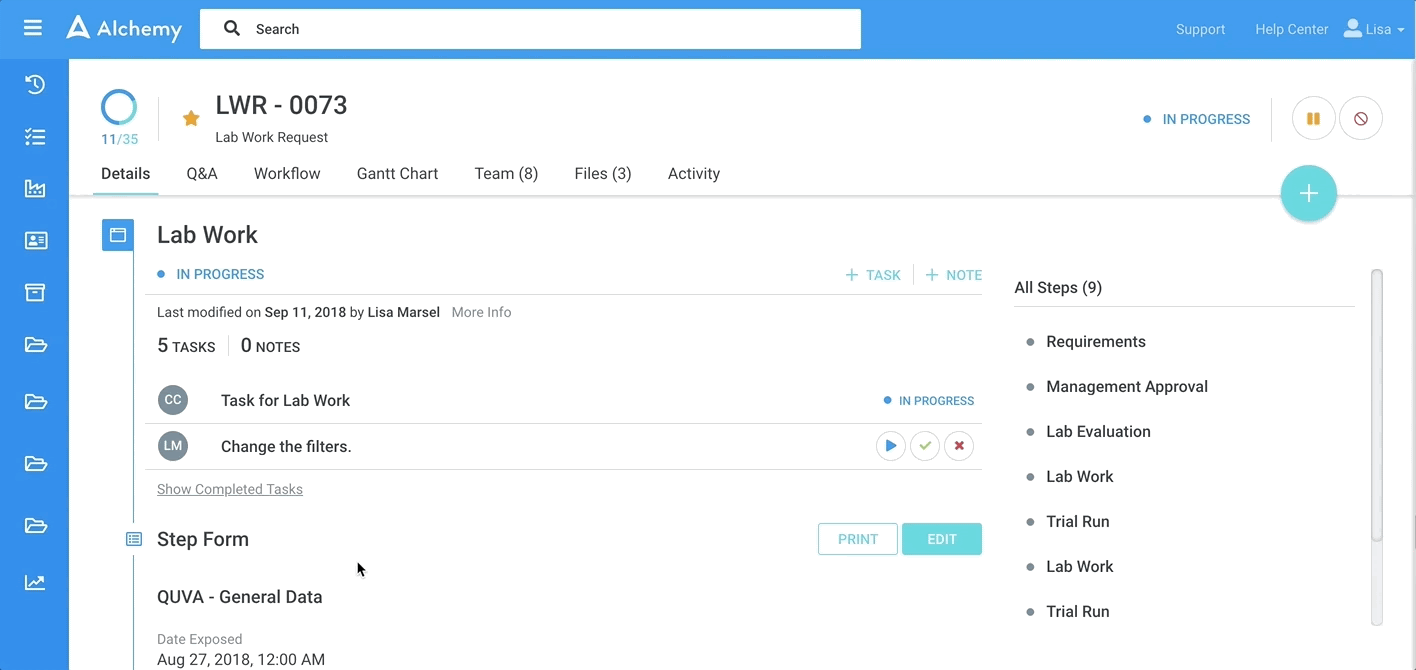
If you want to view additional information about a task, hover over the task name and the detail will appear.

If you would like to re-assign a task to another Alchemy user, hover over the initials of the current task assignee and the list of potential assignees will appear. Click the radio button (empty circle) next to the name of the person who should be assigned, and then click save. You will then see the initials of the new assignee next to that task.

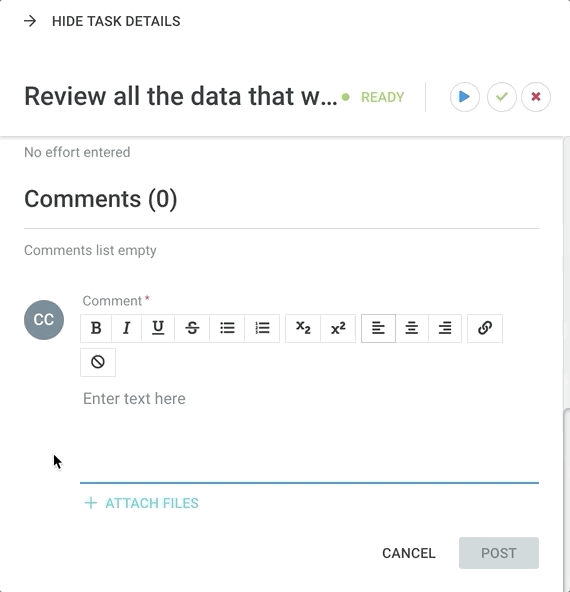
View task details without leaving the page by clicking on a task. The task details will slide out in a panel from the right side. You can scroll up and down in the task panel while still seeing the step info in the left panel.

We have also enabled “mentions” (@name) in task comments, so you can notify your colleagues about important comments associated with a task.
Redesigned step forms
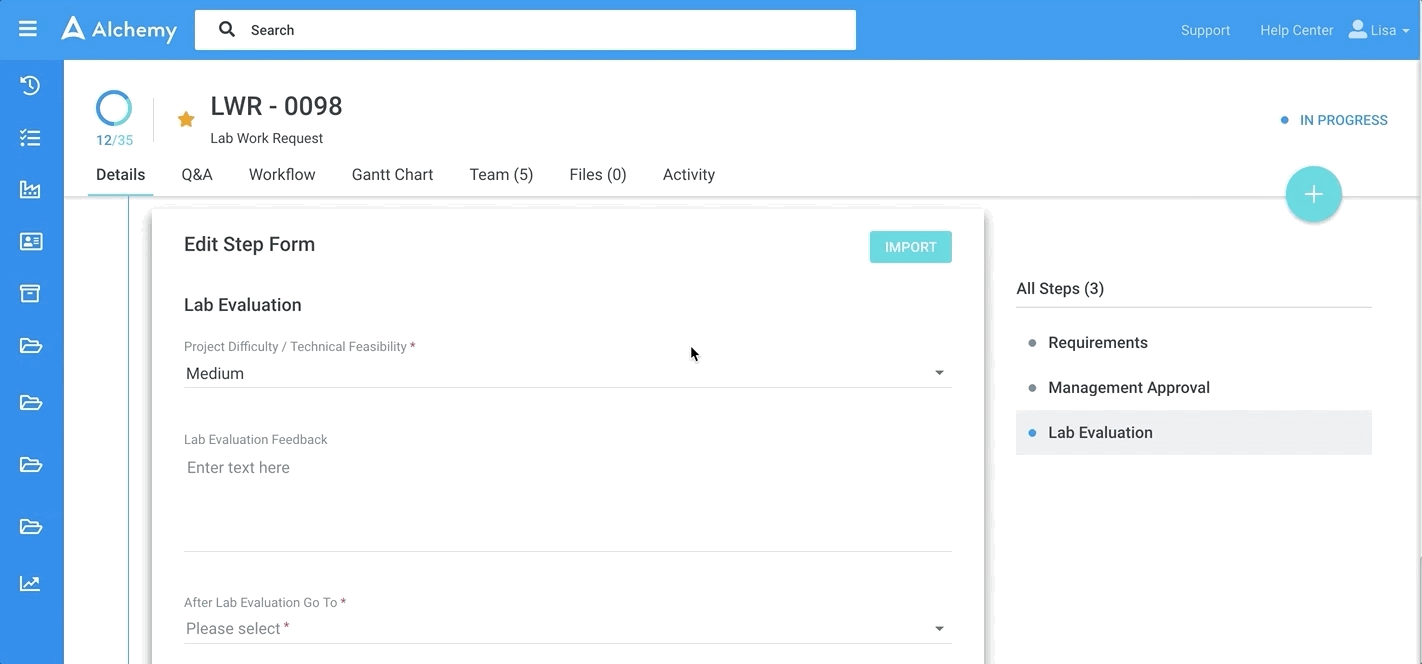
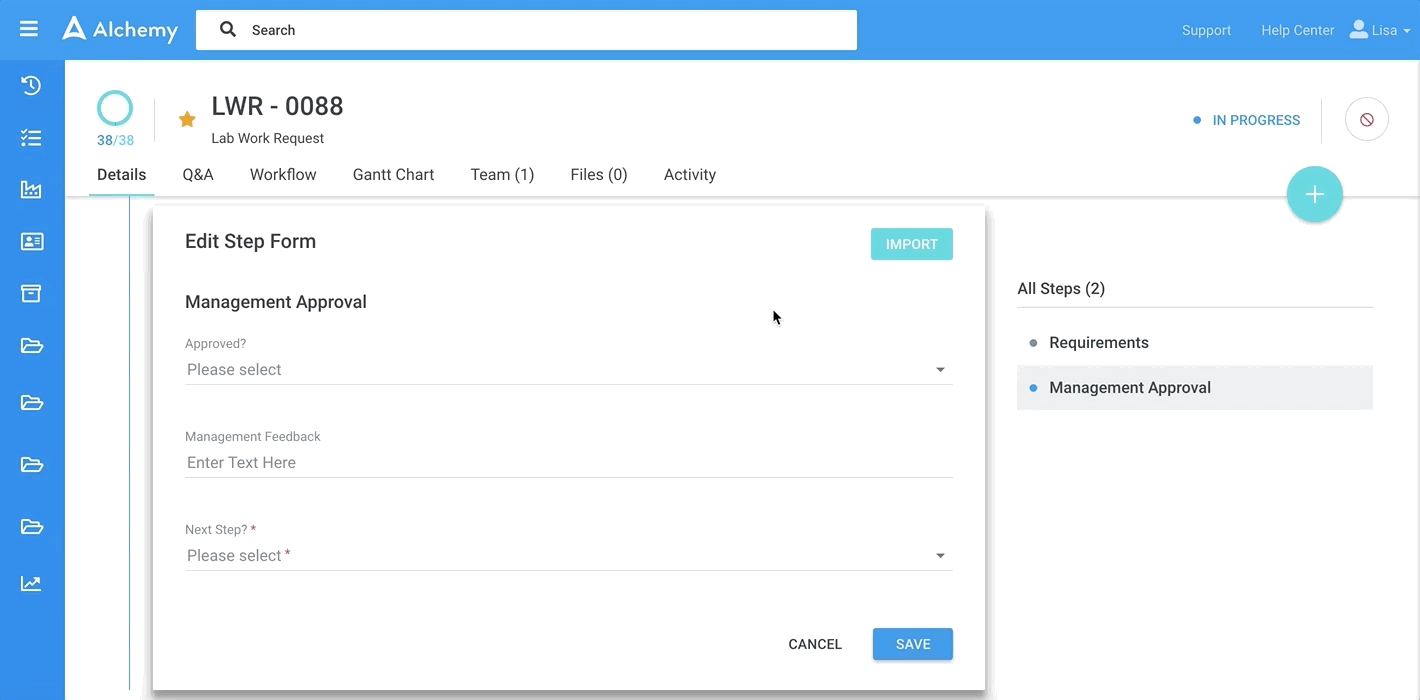
Every step form now can be edited by clicking the turquoise EDIT button. Instead of the form popping up and blocking you from seeing the other process information you need to finalize your work, now it switches to edit mode, enabling you to scroll, see, enter, and edit all the data.
Importing step form data
While in edit mode you can use the new IMPORT button to easily search all previously entered step form data for that exact step and import it in your new form, saving you time.
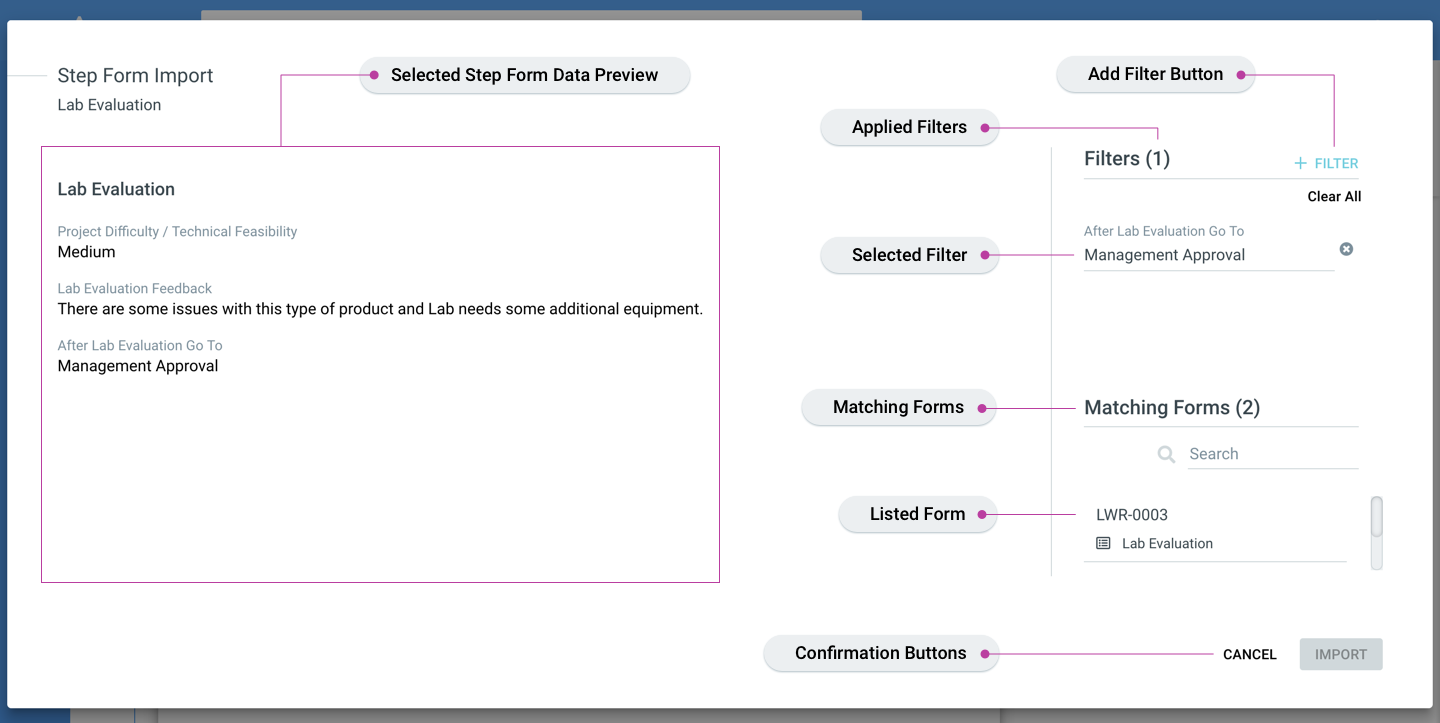
- You can click on the IMPORT button before you enter any data into the form. In that case under Matching Forms you will see the list of all already existing Step Forms related to the Step.
To find the step form that is meeting your needs you can add filter criteria to narrow the list of Matching Forms or search the list to find the form by Process Name.
- If you want to import a certain form from a certain process, you can apply a filter to the search by entering a specific process name into the Search field above the list of suggestions.

- If you want to filter the step forms based on certain criteria or fields of information, first fill in (select?) the specific form field/s that are relevant and then click the IMPORT button, the list of suggested forms will be filtered and only the forms with the matching criteria will be listed.
When you select the form, the fields of the form you are editing will be populated with the related data.
All the imported forms are editable before and after the saving, and also after the step completion.
Before the final IMPORT, you can scroll down the form to make sure you have the right data to be imported.
Printing step forms
Now all step forms can be printed whether they are populated with data or not.
New way to complete a step
We have made the system smarter and simplified the user interface to facilitate you moving forward in your processes. Now, all you have to do is complete a task assigned to you and you will get information about what will happen next.

For all tasks assigned to you, task actions are automatically highlighted.